Flower Bouquet Rose Crochet Free Pattern - Step by step for Beginners (Thai Rose)
Share
Table of Contents:
- Crochet Thai Flower Project Overview
- Crochet Thai Rose Meanings & Usage
- Abbreviations (US Terms)
- Materials
- Tutorial Video
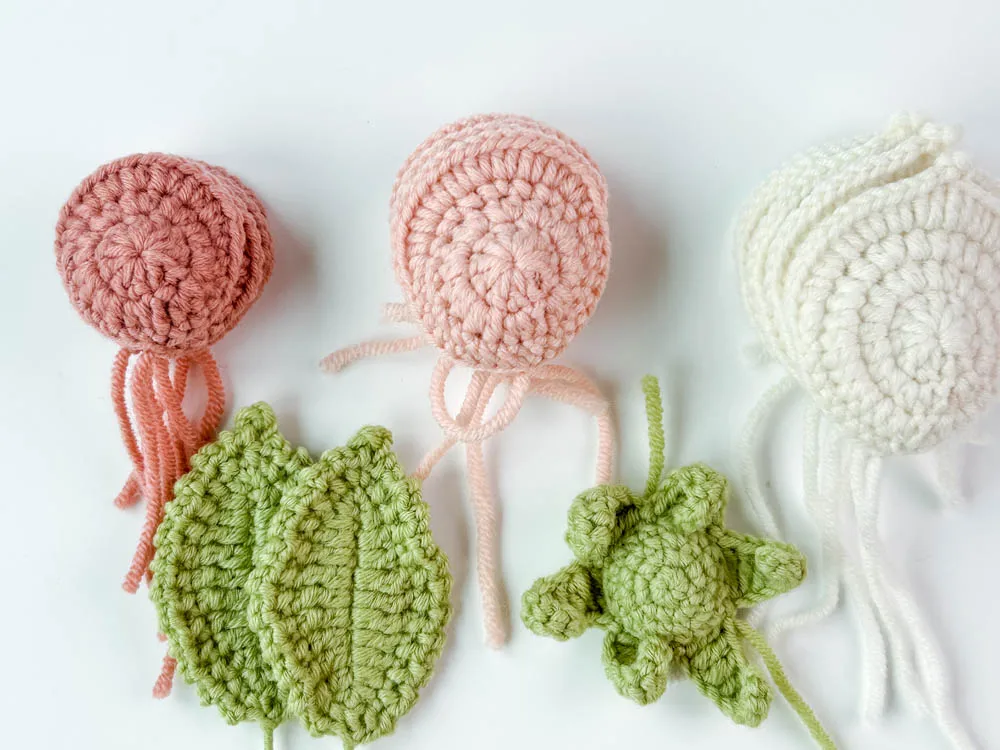
- Rose Crochet Components
- Crochet Thai Rose Assemble
- Finish and share to your friends
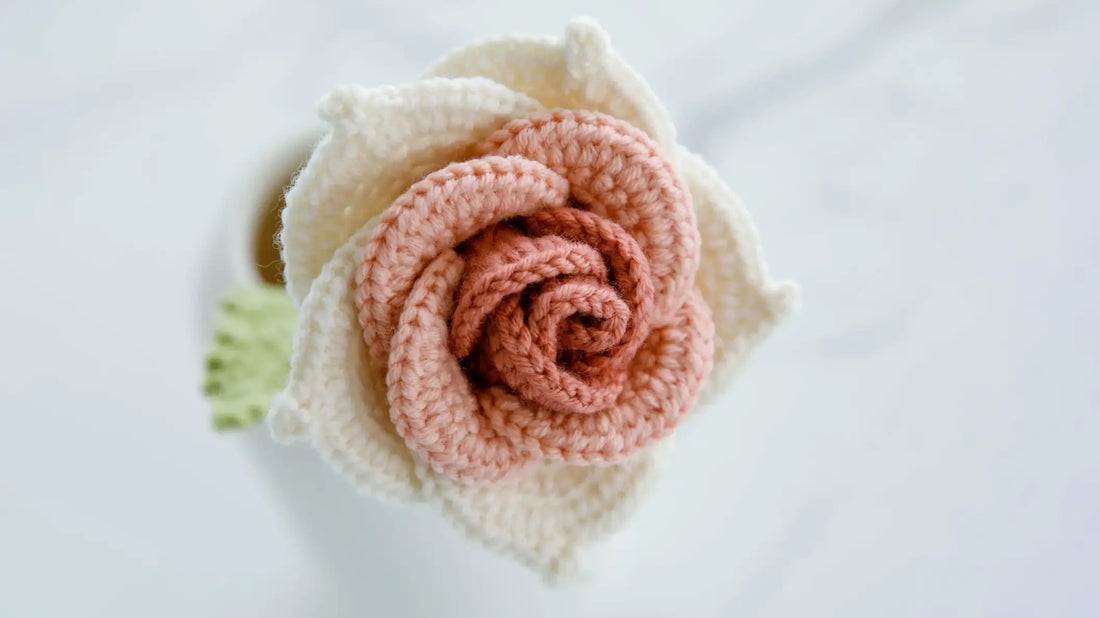
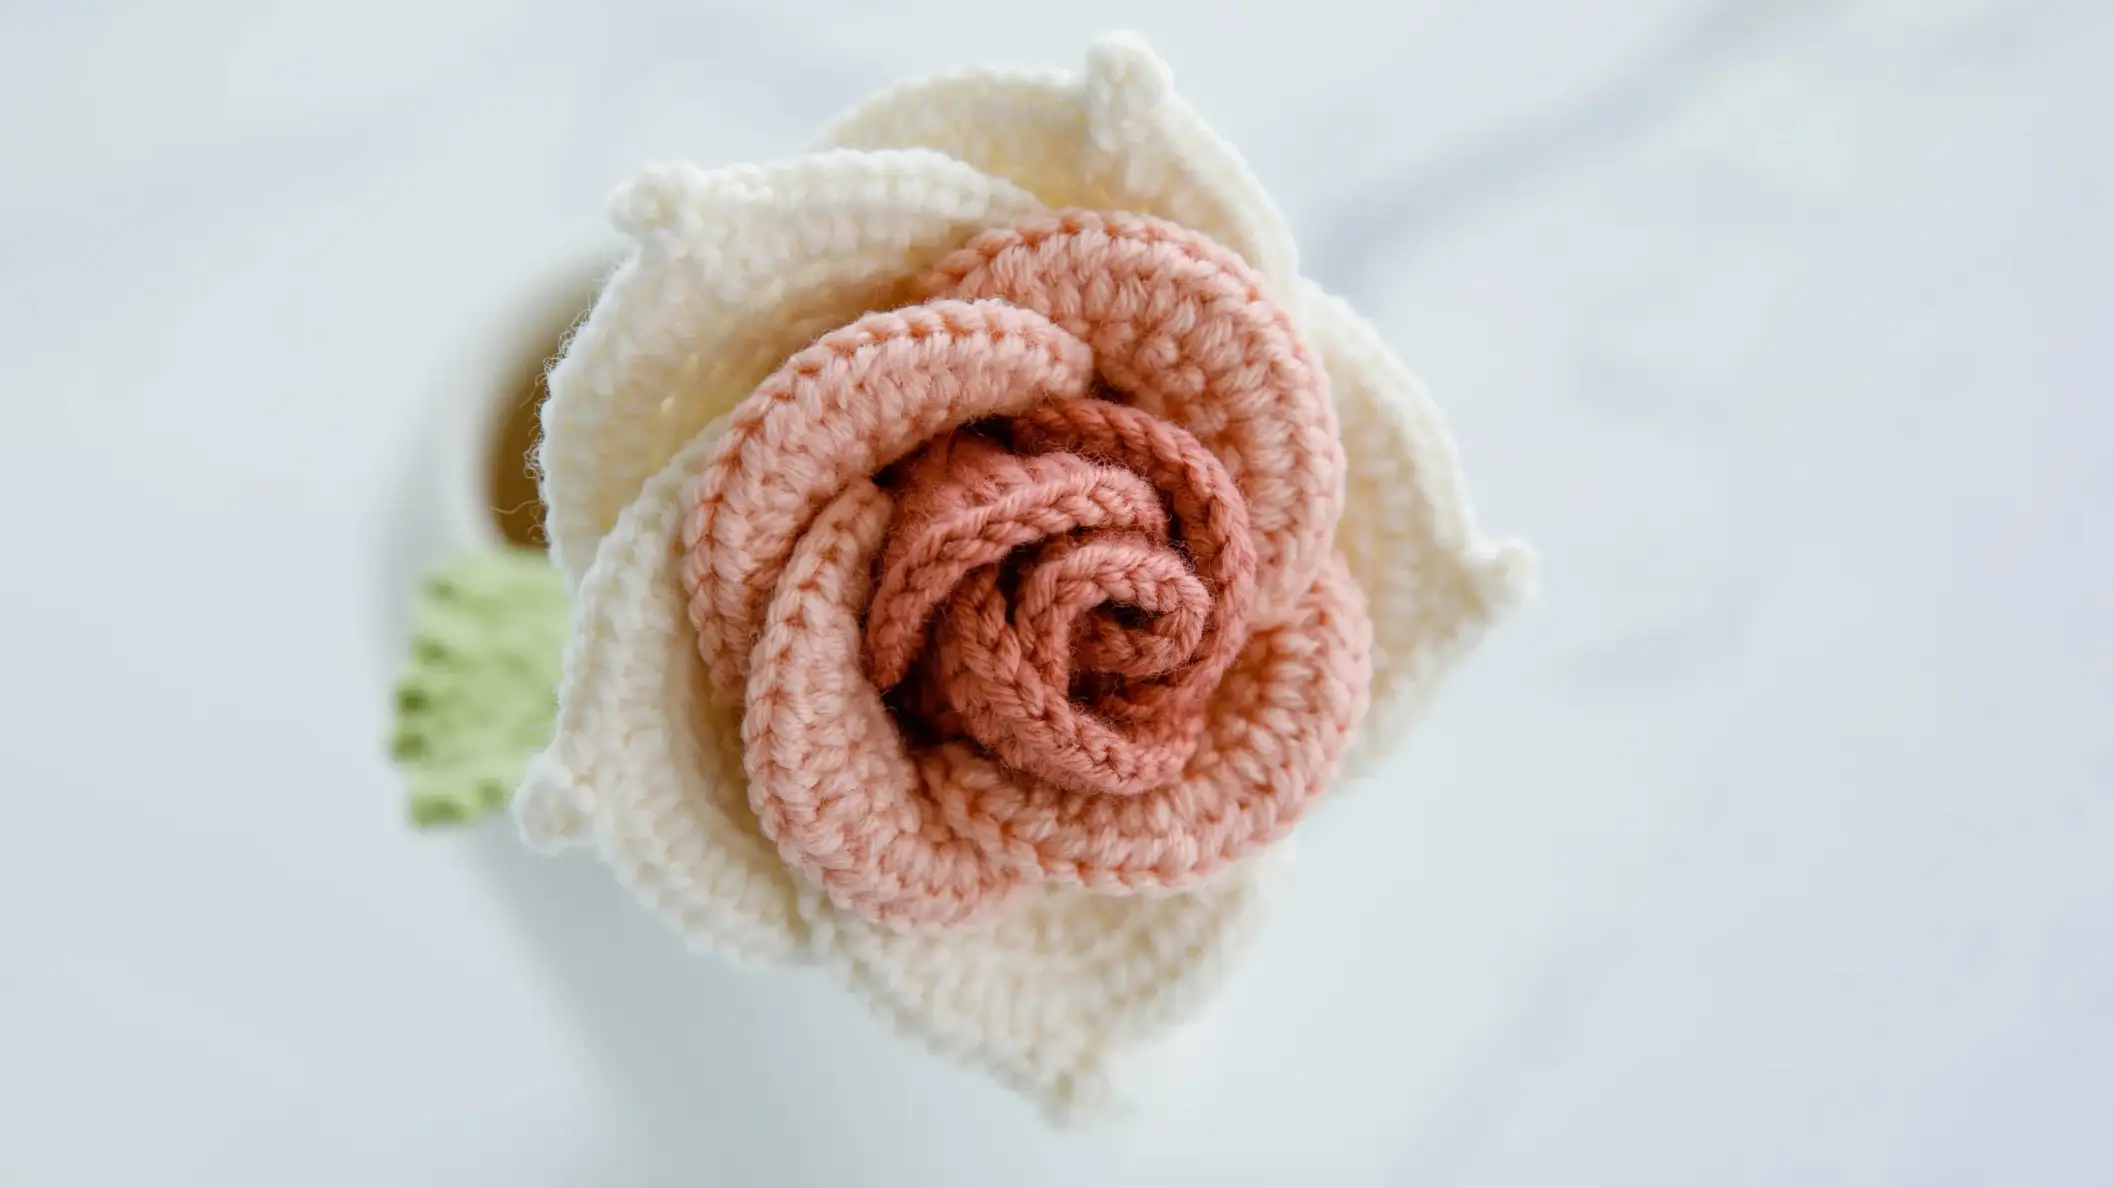
If you're looking for simple, easy crochet flower patterns—perfect for beginners—creating a Thai Rose can be a meaningful way to express love and gratitude. Whether you're crafting a crochet flower bouquet as a thoughtful gift or following a free crochet flower pattern for fun, these crocheted flowers bring charm and beauty to any occasion. Perfect for weddings, anniversaries, or just to show appreciation, a crochet flower bouquet pattern like the Thai Rose is sure to bring a smile.
Start your project today with a FREE PATTERN and create your own story with these timeless and symbolic flowers.
Crochet Thai Rose Meanings & Usage
Thai Roses, with their vibrant colors and delicate petals, carry deep symbolism in Thai culture, representing love, gratitude, and new beginnings. These beautiful blooms are often celebrated in traditional Thai art and ceremonies. Legend says the goddess of love, Phra Mae Thorani, created Thai Roses to spread joy throughout the world.
Details of Thai Rose Crochet Pattern

This Thai Rose pattern is perfect for intermediate crocheters looking to expand their skills. While it may seem intricate, the step-by-step instructions make it accessible even for ambitious beginners. The project involves creating 13 petals in three sizes (4 small, 4 medium, and 5 large), a detailed flower base, and 2 leaves, all coming together to form one stunning bloom.
In nature, Thai Roses come in a variety of colors, from soft pinks and whites to vibrant reds and yellows. Interestingly, these roses are known for their strong fragrance, often used in traditional Thai perfumes and cuisine.
One of the best aspects of this pattern is its versatility. You can easily customize your Thai Rose by choosing different yarn colors to match your decor or preference. Feel free to experiment with the number of petals or leaves to create your unique variation. Some crafters even add beads or embroidery for extra flair!
A single finished Thai Rose measures approximately 3-4 inches in diameter, making it perfect for brooches or hair accessories. For a dramatic effect, create a bouquet of 5-7 roses, which would result in a stunning arrangement about 10-12 inches tall and 8-10 inches wide – a true showstopper for your home or as a heartfelt gift.
Crochet Thai Rose Kits
Discover the magic of Thai Roses with our all-in-one crochet kit! Everything you need to create a stunning bouquet is included – premium yarn, crochet hook, and easy-to-follow instructions. Perfect for gifting or adding a touch of exotic elegance to your home. Start your crochet rose journey today!
Abbreviations (US Terms)
|
Ch |
chain |
|
Sc |
single crochet |
|
Sl |
slip stitch |
|
Inc |
increase |
|
Hdc |
half double crochet |
|
Dc |
double crochet |
|
Tr |
treble crochet |
|
Sk |
skip |
|
St |
stitch |
Materials:
- Light pink and green yarn
- Hook (2/2.5mm)
- 25cm flower rod
- 15cm iron wire
- Hot glue, scissors, needle-nose pliers
Thai Rose Crochet Components:
- A - Petals: 4 small, 4 medium, 5 large
- B - Leaves: 2 leaves
- C - Base: 1 base
Crochet Thai Rose Video Pattern
Crochet Thai Rose Pattern
A1. Make 4 Small Petals
Round 1:
- Start with a magic ring, chain 3, and make 10 double crochet into the ring. Slip stitch to join.
- (Magic ring, ch 3, 10 dc, sl)
- Chain 2, make 2 half double crochets in each stitch around. Slip stitch to join.
- (Ch 2, 2 hdc in each st, sl)
- Chain 1, single crochet 6, make 2 half double crochets in the next 8 stitches, single crochet 6, slip stitch to join.
- (Ch 1, sc 6, 2 hdc in next 8 sts, sc 6, sl)

A2. Make 4 Medium Petals
Round 1:
- Start with a magic ring, chain 3, and make 10 double crochet into the ring. Slip stitch to join.
- (Magic ring, ch 3, 10 dc, sl)
- Chain 2, make 2 half double crochets in each stitch around. Slip stitch to join.
- (Ch 2, 2 hdc in each st, sl)
- Chain 1, single crochet 2, make 1 single crochet in next stitch, 2 single crochet in the next stitch, repeat 8 times, single crochet 2, slip stitch to join.
- (Ch 1, sc 2, (sc, 2 sc in next st) * 8, sc 2, sl)
- Chain 1, single crochet 9, make 2 half double crochets in the next 10 stitches, single crochet 9, slip stitch to join.
- (Ch 1, sc 9, 2 hdc in next 10 sts, sc 9, sl)

A3. Make 5 Medium Petals
- Start with a magic ring, chain 3, and make 10 double crochet into the ring. Slip stitch to join.
- (Magic ring, ch 3, 10 dc, sl)
- Chain 2, make 2 half double crochets in each stitch around. Slip stitch to join.
- (Ch 2, 2 hdc in each st, sl)
- Chain 2, half double crochet in first stitch, 2 half double crochet in the next stitch, repeat 10 times, slip stitch to join.
- (Ch 2, (hdc, 2 hdc in next st) * 10, sl)
- Chain 1, single crochet 8, make 2 half double crochets in the next 6 stitches, (half double crochet, double crochet), chain 3, slip stitch in the first chain, (double crochet, half double crochet), 2 half double crochets in the next 6 stitches, single crochet 8, slip stitch to join.
- (Ch 1, sc 8, 2 hdc in next 6 sts, (hdc, dc), ch 3 picot, (dc, hdc), 2 hdc in next 6 sts, sc 8, sl)

B. Make 2 Leaves
- Chain 12, add wire, single crochet in the second chain from the hook, half double crochet in the next stitch, double crochet in the next two stitches, treble crochet in the next three stitches, double crochet in the next two stitches, half double crochet in the next stitch, make 3 single crochets in the last stitch. Work back down the other side: half double crochet, double crochet in next two stitches, treble crochet in the next three stitches, double crochet in the next two stitches, single crochet in the last stitch. Slip stitch to join.
- (Ch 12, sc, hdc, dc 2, tr 3, dc 2, hdc, 3 sc in last st, hdc, dc 2, tr 3, dc 2, sc, sl)
- Chain 2, single crochet in each stitch 12 times, at the leaf tip, chain 3, slip stitch in the first chain, single crochet, chain 2, single crochet 12 times, slip stitch to join.
- (Ch 2, sc) * 12, ch 3 picot, (ch 2, sc) * 12, sl

C. Make 1 Base
Round 1:- Start with a magic ring, chain 1, and make 6 single crochet into the ring. Slip stitch to join, chain 1.
- (Magic ring, ch 1, 6 sc, sl, ch 1)
- Make 2 single crochets in each stitch around. Slip stitch to join.
- (2 sc in each st, sl)
- Chain 1, single crochet in the first stitch, make 2 single crochets in the next stitch, repeat 6 times. Slip stitch to join.
- (Ch 1, (sc, 2 sc in next st) * 6, sl)
- Chain 1, make 18 single crochets around. Slip stitch to join.
- (Ch 1, 18 sc, sl)
- Chain 9, start in the 2nd chain from the hook, make 2 slip stitches, 1 single crochet, 2 half double crochets, 2 double crochets, 1 treble crochet, skip 2 stitches on the base, slip stitch into the next stitch. Repeat 6 times.
- (Ch 9, sl 2, sc, 2 hdc, 2 dc, tr, sk 2, sl) * 6

Rose Assemble

Step 1: Wrap the small petals around the floral rod one at a time, using glue at the base to secure them together.
Step 2: Take the middle petals and wrap them around the small petals, slightly overlapping each other. Glue them in place until all the small petals are covered.
Step 3: Take the large petals and continue the process. Place each large petal so the tip sits between two middle petals, and glue them to the outer part of the middle petals one by one. Trim any excess tails.
Step 4: Insert the floral rod with the assembled petals through the center of the sepal. Glue the sepal to the base of the petals, making sure the sepal tips curve outward.
Step 5: Wrap green yarn around the rod a few inches down, then attach the leaves on opposite sides. Continue wrapping the yarn to the end of the rod and secure it with glue. Arrange the leaves to make them look neat and balanced.

Finish and share to your friends
Share the beauty of your handmade creations by spreading the word about our crochet flower bouquet patterns! If you've enjoyed working on any of our easy, step-by-step crochet patterns, why not share the joy with others? Whether you're a beginner or a seasoned crocheter, we offer a wide range of crochet flower bouquet patterns that are free and fun to create.
When you share our crochet flower bouquet patterns, you're helping others discover the joy of crafting something beautiful and lasting. These crochet flowers make wonderful gifts for loved ones or can be used to add a touch of handmade elegance to your home. Plus, each bouquet tells its own story, adding a personal touch to any occasion.
Invite your friends and family to try their hand at these beginner-friendly crochet flower patterns. Whether they're looking for something simple or a bit more challenging, they'll find joy in crafting their own bouquets. Don't forget to tag us and share your beautiful creations on social media! Together, we can build a community that appreciates the art of crochet and the happiness it brings.
More Crochet Patterns
If you’ve enjoyed this crochet sunflower pattern, you may be interested in these other free patterns:
- Crochet Rose
- Crochet Daisy
- Crochet Lavender
Check out the link for more free patterns!

